G80 Boost Launch Harness 🚀 / Brake Boost Launch Harness / Brake Snip / Burnout Switch / 2018-2020 Genesis G80 Sport


G80 Boost Launch Harness 🚀 / Brake Boost Launch Harness / Brake Snip / Burnout Switch / 2018-2020 Genesis G80 Sport
It is your responsibility to comply with all applicable federal and state laws relating to the use of this part and Zacarias Engineering LLC. hereby disclaims any liability resulting from the failure to use this part in compliance with all applicable federal and state laws. See full legal disclaimer at the bottom of this listing.
Introducing the G80 Boost Launch Harness, your ultimate solution to unlocking unparalleled acceleration 🚗💨 off the line without the hassle of sketchy Facebook pay or searching for availability through random Facebook posts. Designed for speed enthusiasts seeking to elevate your launch game and slash your dig and quarter-mile times without breaking the bank on TCU or ECU tunes.
Why choose the G80 Boost Launch Harness (BLH) versus through a Facebook Post?
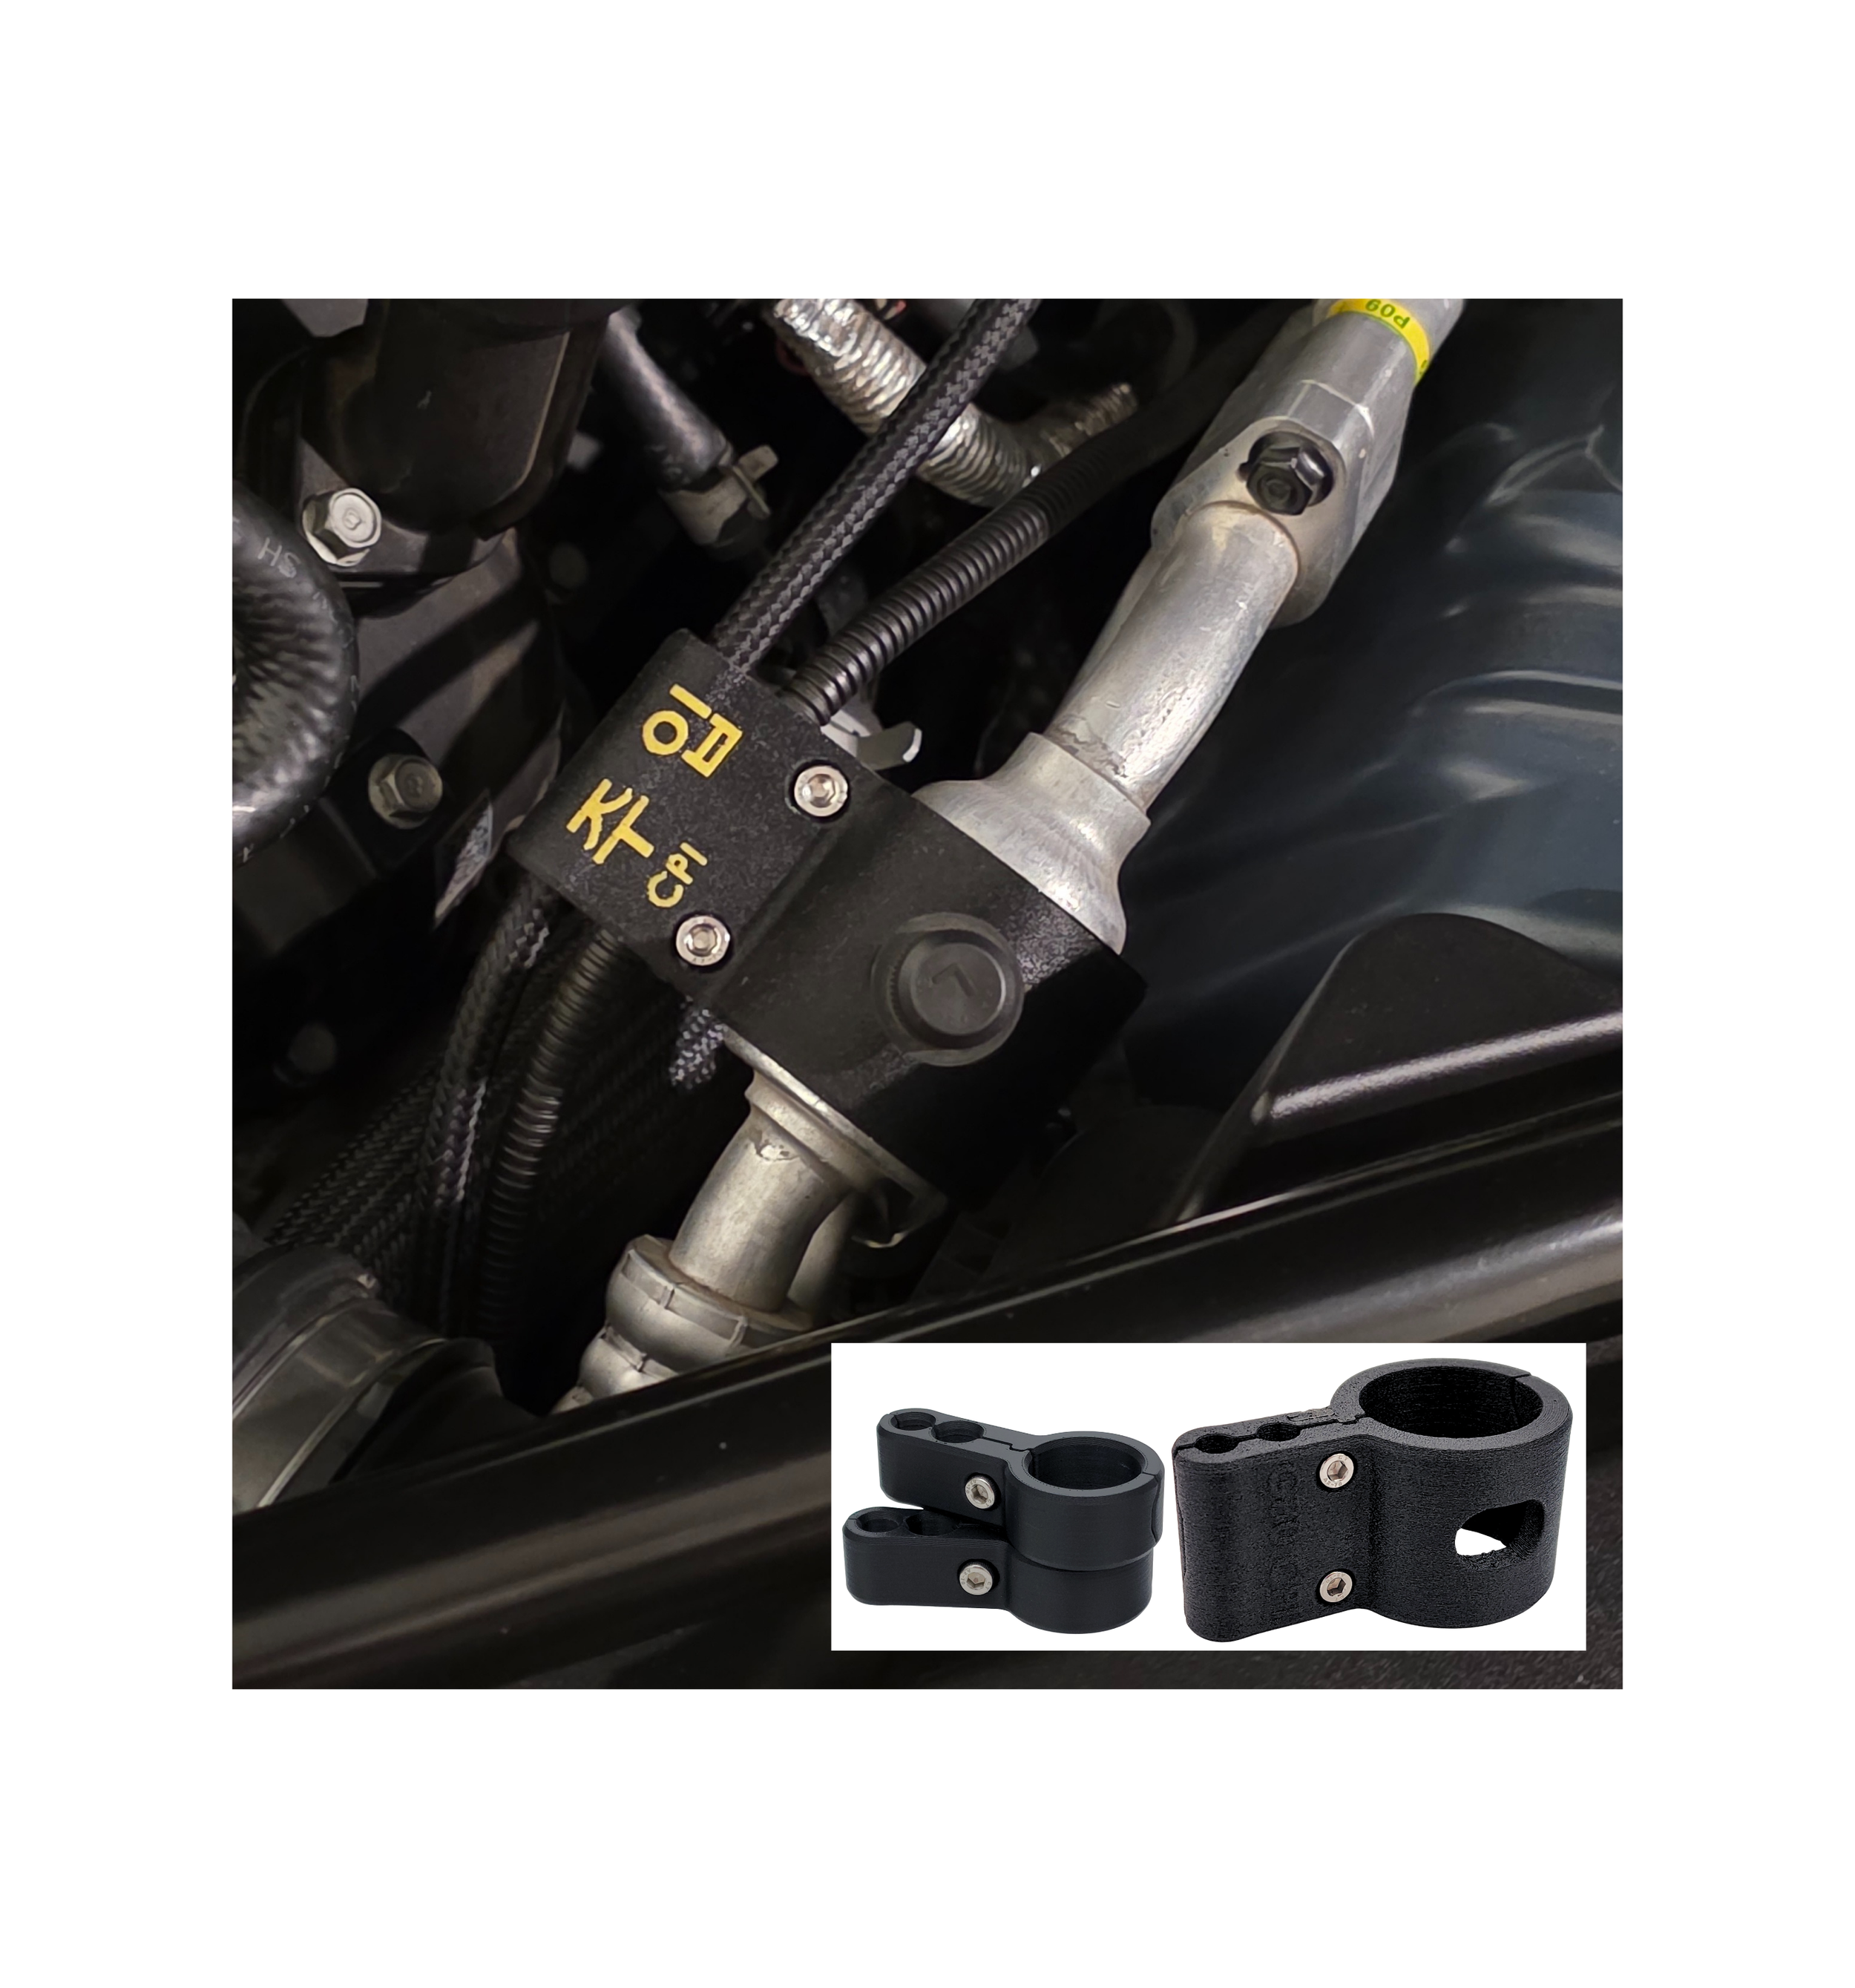
This BLH has the potential to be compatible with any turbocharged vehicle equipped with a Micro 2 Brake Switch fuse or Brake Lamp fuse, similar to other prevalent Hyundai/Kia models like the Stinger or Kona. However, this BLH is specifically customized for the G80 Sport platform by an actual G80 Sport user while offering comprehensive instructions for both installation and operation tailored to this particular vehicle.
Tailored for the G80 Sport:
Length is optimized to minimize excessive slack while providing adequate strain relief
Optional BLH Switch Backshell upgrade available, coming soon
Optional G80 Boost Launch Harness Fuse Box Cover upgrade available, coming soon
Detailed how-to-use and installation instructions based on the G80 Sport platform
BLH uses a Micro 2 connector as required by the G80 platform
What is a Brake Boost Launch Harness?
When applying the brakes on your vehicle, your RPM’s are limited making it impossible to build boost at launch. With this harness, you are now given the ability to switch this restriction ON or OFF. While in the OFF position, you are now in control of how much boost you are delivering to your engine.
Quality & Support:
Every BLH undergoes a rigorous continuity and isolation (C&I) check and Pull Tested prior to shipping. By doing so, guaranteeing electrical and mechanical integrity ensuring optimal performance and durability while adhering to industry standards.
Unlike a fleeting Facebook post, Zacarias Engineering is steadfast and accessible for inquiries and support, ensuring reliability and peace of mind for our customers.
Cost-Effective Performance Enhancement:
Unlike costly TCU tunes or invasive ECU modifications, this BLH offers a more economical alternative. With our harness, you can achieve remarkable performance gains without emptying your wallet.
Plug-and-Play Convenience:
Installing the BLH is a breeze, thanks to its simple plug-and-play design. No need for complex wiring or technical expertise—simply connect the harness to your vehicle's existing fuse box (BRAKE SWITCH fuse location), and you're ready for those gains. Plus, you can revert to stock settings or remove the harness whenever desired.
Links:
ZacariasEngineering.com (Directly from Creator & Maker):
https://www.zacariasengineering.com/shop-online/ze-2024-a-0100
Genesis G80 Owners with Modifications Facebook Support Community:
https://www.facebook.com/groups/717647390199949
How does it work? How to use? How to install? Troubleshooting Sections:
How does it work?
Page 7-65 from your Genesis G80 Manual (2018) or rear side of fuse box cover shows the fuse box diagram where you’ll find the “BRAKE SWITCH” fuse position with a 10-amp fuse (Not to be confused with the Stinger “STOP LAMP” fuse position, different function). During normal stock use, this circuit communicates with the ECU and is a complete circuit. One of the functions of this circuit is to communicate to the ECU when you have applied your vehicle brake pedal. When applying your brake pedal, the ECU will limit the number of allowable engine revolutions or RPM’s. Resulting in the inability to build boost during launch.
By adding a switch to this circuit, you are now given the ability to remove this RPM limitation from the ECU by masking your brake press. Resulting in the ability to build boost during launch.
Note that on Stinger platforms, a STOP LAMP fuse is used which will disable your brake taillights. This does not occur on the G80 Sport platform.
Boost Launch Harness (BLH) ON and OFF Switch positions:
“1” or “ON” position, the circuit is complete, ECU registers when the brakes are applied.
“O” or “OFF” position, the circuit is incomplete, ECU does not register when the brakes are applied.
How to use your BLH for a boosted launch (Pics)?
Deactivate the Electronic Stability Control (ESC) System: State 2 -
Press the ESC OFF button for more than 3 seconds. “ESC OFF” indicator icon will illuminate on dashboard and ESC OFF warning chime will sound. At this state, the engine control function and brake control function do not operate. Page 3-98 & 5-49, Genesis G80 Manual (2018).
Activate SPORT Mode -
Press the Drive Mode button twice. “SPORT” indicator Icon will illuminate on dashboard and SPORT mode is active. At this stage, after accelerating and releasing the accelerator pedal, the gear and engine speed RPM may not drop as soon as in NORMAL mode. Page 3-101& 5-56, Genesis G80 Manual (2018).
Switch Boost Launch Harness (BLH) to the OFF position -
Press the “O” or “OFF” side of the BLH Switch. At this stage, the engine or ECU does not register when your brake pedal is pressed.
WARNING: When continuing to drive after initial launch, the ESC icon, above the ESC OFF icon, will illuminate after or soon after the initial launch. At this stage, the engine may not respond to the accelerator as it does under routine conditions and engine RPM may not increase even if you press the accelerator pedal deeply. This is to maintain the stability and traction of the vehicle and does not indicate a problem. Page 5-48, Genesis G80 Manual (2018).
Build Boost and Launch! The Learning Curve –
Forcefully apply and hold the brake pedal to its maximum pressed position.
Apply pressure to the accelerator pedal to initialize boost build by increasing engine RPM (shall not exceed over 2,700 RPM to avoid engine failure) within a period of 1 second or less followed by IMMEDIATELY releasing the brake pedal and fully pressing the accelerator pedal for Wide Open Throttle acceleration.
CAUTION – SERIOUS INJURY OR DEATH RISK:
Only experienced drivers shall use!
Maintain a forceful or firm grip on the steering wheel at all times. Failure to do so may result in loss of control, leading to serious injury or death.
Prevent tire spin by manually shifting gears as required. Improper handling may cause the vehicle to lose traction, resulting in accidents with potentially fatal consequences.
Exercise extreme caution and adhere strictly to safe driving practices to minimize the risk of harm to yourself and others.
CAUTION – VEHICLE AND ENGINE FAILURE RISK:
Excessive boost pressure may result in severe engine damage, including detonation, engine failure, or overall vehicle malfunction.
It is crucial to understand that the user assumes full responsibility and bears sole accountability for any related damages, injury or death.
Note to user: Performance gains are user or driver dependent with an expected Learning Curve. Practice under safe conditions and within a closed safe non-public environment is expected. See full disclaimer.
Return to normal driving condition after Initial Launch –
Bring the vehicle to a complete and safe stop.
Activate the Electronic Stability Control System –
Press the “1” or “ON” side of the BLH Switch.
Press the Engine Start/Stop button to turn off the vehicle.
Open the driver’s side door. Wait for all electronics/illuminated icons to turn off. Close the driver’s side door.
Press the Engine Start/Stop button to turn on the vehicle.
The ESC icons illuminate, then turn off if the ESC system is operating normally. Page 5-49, Genesis G80 Manual (2018).
You are now back to normal driving conditions.
Installation Instructions (Pics):
Locate and remove the instrument panel fuse box cover (FBC). Page 7-64, Genesis G80 Manual (2018).
Inside the fuse/relay box cover, you can find the fuse/relay label describing fuse/relay names and capacities. Locate the BRAKE SWITCH fuse. Page 7-64, Genesis G80 Manual (2018).
Remove the BRAKE SWITCH fuse.
Press-fit the BLH connector into the BRAKE SWITCH fuse position.
Verify that the BLH Fuse is secured and engaged properly into the BLH Fuse Box as shipping may have caused BLH Fuse to disengage.
Route BLH Switch through the bottom opening of the FBC. Flex FBC opening to avoid marring.
If equipped with the optional Switch Backshell (SBS) upgrade, slide and snap the SBS through the rear opening of the FBC.
If equipped with the optional G80 Boost Launch Harness Fuse Box Cover (BLHFBC) upgrade, simple install the BLHFBC in the OEM position.
Press the “1” or “ON” side of the BLH Switch.
Press Engine Start/Stop button to turn vehicle on.
If vehicle turns on as normal, installation is complete.
If vehicle does not turn on and the BRAKE SWITCH FUSE icon is illuminated on the dashboard, see Troubleshooting section.
Troubleshooting – Vehicle will not turn on or shift into Drive:
Press the Engine Start/Stop button to turn off the vehicle.
Open the driver’s side door. Wait for all electronics/illuminated icons to turn off. Close the driver’s side door.
If BLH Switch is on the “O” or “OFF” position:
Vehicle will NOT turn on and BRAKE SWITCH FUSE icon will illuminate on the dashboard.
Switch to the “1” or “ON” position.
Press the Engine Start/Stop button to turn on the vehicle.
If BLH Switch is on the “1” or “ON” position and vehicle continues to NOT turn on and the BRAKE SWITCH FUSE icon is illuminated on the dashboard:
Disconnect the BLH from the fuse box and reconnect to the BRAKE SWITCH fuse position ensuring proper contact. Force may be required to press-fit the BLH connector into the fuse box (common during initial installation).
If vehicle continues to not turn on, BLH Switch polarity may be reversed.
Treat “O” or “OFF” position as on.
Treat “1” or “ON” position as off.
If vehicle continues to not turn on, replace the BLH 10A Fuse.
If vehicle continues to not turn on, replace the BLH.
Shipping?
Free domestic shipping is included. International Shipping is now available through our Etsy or eBay listing.
LIABILITY & LEGAL DISCLAIMER:
IT IS YOUR RESPONSIBILITY TO COMPLY WITH ALL APPLICABLE FEDERAL AND STATE LAWS RELATING TO THE USE OF THIS PART AND ZACARIAS ENGINEERING LLC. HEREBY DISCLAIMS ANY LIABILITY RESULTING FROM THE FAILURE TO USE THIS PART IN COMPLIANCE WITH ALL APPLICABLE FEDERAL AND STATE LAWS.
THIS PART IS LEGAL FOR USE ONLY IN COMPETITION RACING VEHICLES OR OFF-ROAD VEHICLES AND IS NOT LEGAL FOR USE IN ANY OTHER MOTOR VEHICLE ON PUBLIC ROADS. THIS PART MAY ONLY BE USED ON COMPETITION RACING OR OFF-ROAD VEHICLES OPERATED EXCLUSIVELY ON A CLOSED COURSE IN CONJUNCTION WITH A SANCTIONED RACING EVENT. COMPETITION-ONLY MOTOR VEHICLES MAY NOT BE DRIVEN TO A RACING EVENT ON A PUBLIC HIGHWAY AND MUST BE TRANSPORTED ON A TRAILER OR OTHER CARRIER. USE OF THIS PART IN ANY OTHER VEHICLE MAY SUBJECT YOU TO FINES AND PENALTIES FOR VIOLATION OF FEDERAL AND/OR STATE LAW, THIS PART WILL VOID YOUR VEHICLE'S WARRANTY.
Copyright © Zacarias Engineering LLC. All rights reserved.


Source: JayDrifts9k
Source: OVRBoosted
Source: Militarized_StingerGT2